
Thanksgiving STEM
Thanksgiving STEM
From designing turkey nests to sailing the Mayflower, we have compiled a list of our favorite Thanksgiving and fall STEM activities to celebrate the season.
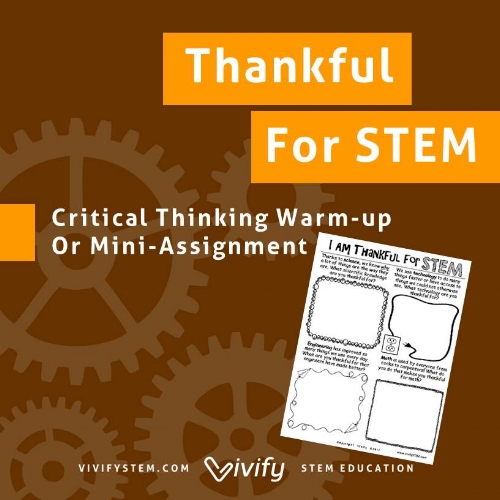
Make sure to sign up for our newsletter to download Thankful for STEM freebie! Challenge your kids to be thankful for the things they may take for granted in STEM.
1. Set Sail on the Mayflower
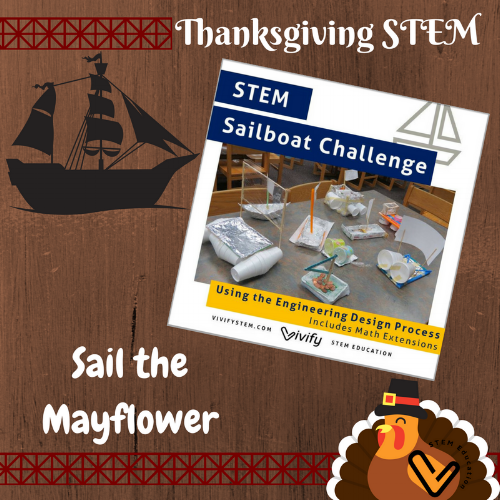
Click to sail the Mayflower with the Sailboat Challenge.
Set sail on the Mayflower using this Sailboat STEM Challenge. Many are familiar with the raft buoyancy challenge, and this takes it one step further by adding a sail! Now students must build a boat to hold a specific weight as well as incorporate aerodynamic principals to make it move.
*Sailboat STEM challenge has been updated with digital and printed STEM journals and an instructional video to support distance learning
2. Turkey Nest Challenge
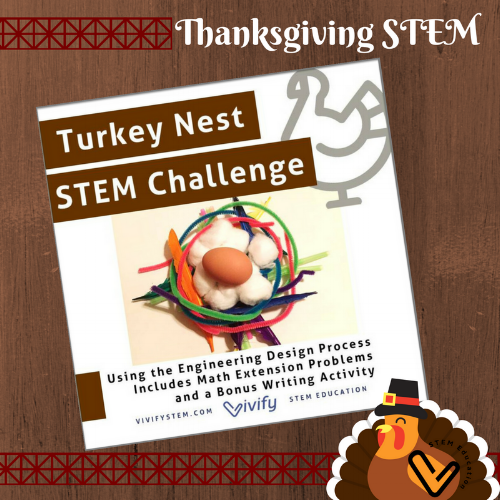
Thanksgiving Turkey Nest engineering design challenge is a twist on the classic egg drop challenge! Click to see it in our TpT store.
Help save the turkeys with the Turkey Nest Challenge with bonus Predator Protection design and writing activity. Students will practice the engineering design process with this hands-on STEM challenge building a turkey nest to safely catch a falling egg. A fun twist on the classic egg-drop challenge, this activity is an exciting way to foster critical thinking and team building skills.
An included bonus activity adds an additional conceptual design challenge and writing topic. Students must brainstorm and design a device to protect the newly laid turkey eggs from predators. Find out more here or see on the products page of this website.
3. Flying Turkeys
Create a flying turkey to sling into the air! Explore aerodynamics by adjusting your design.
Create these adorable turkeys out of paper then make them fly! Instructions for building that follow the images above:
Step 1: Cut a piece of copy paper or construction paper in half length-wise (hamburger style!). Fold one half accordion-style across the width for the tail feathers.
Step 2 - 4: Fold the other half into an airplane for the turkey body.
Step 5: Cut about one inch off of the accordion half perpendicular to the folds. Then fit the accordion into the back of the airplane. Tape the back of the airplane closed around the accordion tail-feathers. The tape the end edges of the accordion tail feathers to the wings of the airplane.
Step 6: Now cut a small slit about a paperclip’s length from the nose of the airplane (turkey beak). This is where the paperclip will slide in. Bend the outer end of a paperclip out about 30 degrees and slide the inside end through the slit you just made.
Hook a rubber band onto the paperclip, pull back your turkey and let it fly!!! Optimize your turkey’s aerodynamics by adjusting the wing shape or adding weight by taping paperclips to different areas. Can you make your turkey fly straighter, farther, or more accurately?
4. Pick Up Leaves

Be an engineer and design a device to pick up leaves! Fun for all ages!
Kids of any age will have fun with this engineering activity! Place leaves on the floor (I used fake leaves since we were doing it inside). Then explain that the kids have been chosen to be engineers and their first mission is to design and build a device to pick up the leaves. Here are the constraints (rules):
You cannot bend over (optional for younger kids).
Your hands may not touch the leaves (pretend they are poisonous).
You can only use the supplies provided.
For building, provide items such as craft sticks, straws, pipecleaners, toothpicks, paper tubes, cardboard, paper plates, scissors, and tape.
Remind students of the engineering design process. See our post here to learn more about the engineering design process. Have them sketch a plan and then build it. They should test their creations then improve if possible. Who can pick up the most leaves? Who can pick them up the fastest?
5. Leaf Chromatography Experiment-
Why do leaves change colors?

Discover why leaves change colors in the fall with facinating leaf pigment chromatography!
As the long summer days fade into shorter fall days, the trees begin to prepare for winter. With less sunlight and less water, the tree leaves are no longer able to perform photosynthesis (the process that plants use to form energy). Photosynthesis is made possible by a chemical called chlorophyll that happens to be green! Thus, the leaves no longer need the green chlorophyll and turn into the beautiful hidden fall colors of yellow, red, and brown.
Want to see this science in action? Me too! Complete the following (from education.com):
What You Need:
leaves (Different colors, best if they are from the same tree)
small jar
cover for jars
rubbing alcohol (at least 50% isopropyl alcohol)
paper coffee filter
shallow dish
hot tap water
plastic knife or spoon
What You Do:
Gather 2-3 large leaves of different colors (Green, Yellow, Red, etc). It is best if the leaves are from the same tree to compare the stages of the leaves losing their green pigment, but it isn’t necessary.
Tear or chop the leaves into tiny pieces and put them into small jars. Place the jars into a shallow tray.
Add rubbing alcohol to the jars to cover the leaf pieces. Using a plastic knife or spoon, gently chop and grind the leaves in the alcohol. (NOTE: rubbing alcohol can be harmful if mishandled or misused. Use in a well-ventilated area, and avoid contact with skin.)
Cover the jars loosely with a lid, plastic wrap, or aluminum foil.
Gently pour about 1 inch of hot tap water into the tray to heat the jars.
Keep the jars in the water for at least 30 minutes, or until the alcohol has become colored like the leaves (the darker the better). Swirl the jars gently about every five minutes. Replace the hot water if it cools off.
Remove the jars from the water and uncover them. Place a long strip of filter paper into the jars so that one end is in the alcohol. Bend the other end of the paper over the rim of the jar and tape it there.
After 30-90 minutes you will see colors traveling up the filter paper. Different colors will travel different distances up the paper as the alcohol evaporates. The green leaves may show bands of yellow, orange, and red, while red leaves may only show red to brown. Try to guess what colors the leaves will turn before falling from the tree!
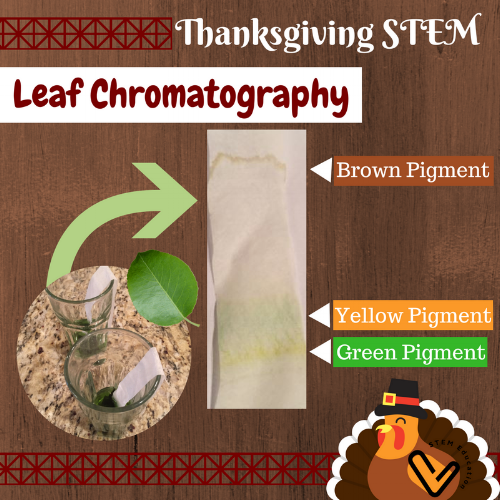
This leaf chromatography science experiment shows what will happen when our green leaves turn colors in the fall.
Need another quick warm-up or critical thinking activity in addition to our FREEBIE? Remind your kids that Thanksgiving is about gratitude and kindness. Ask them to brainstorm and design a device or plan to help someone they know who is in a difficult circumstance or season.
More great Thanksgiving STEM can be found here on www.STEMactivitiesforkids.com or click the graphic below.

More Thankful for STEM resources for the season!