
How to Launch Model Rockets & Amaze Your Students! (Pt 1)
Post by Natasha Wilkerson
Originally Posted: July 9, 2018
Updated: March 2025
Whether in elementary or high school, model rockets never fail to captivate and amaze my students! Nothing beats pushing a button to create a small explosion that launches your creation hundreds of feet overhead and and then watch it gracefully fall back to the ground.
Do you want to launch a rocket with your students or kids? Are you afraid or unsure where to start? Keep reading for a beginner's guide to model rockets based on my years of experience launching hundreds of model rockets with all ages. I also linked to a Google Drive folder with tons of valuable resources to get you started!
This post is part one of a three part series on model rocketry in the classroom.

My First Rocket Launch
I am shocked when most kids and teachers say they have never launched a model rocket! I guess after four years of Space Club and over 120 rocket launches per year, I just assume everyone has experienced it!
But I remember the first time I decided to launch a rocket and the nervous excitement I felt when receiving the Alpha III rocket kit. After building the rocket (and stressing about every detail), I walked to an empty field for the launch. I brought along a co-worker who was terrified we would catch something on fire or maybe the whole thing would blow up! Assuring her I knew what I was doing (I am an aerospace engineer after all!), we set-up the launch. I nervously held the launch controller and hoped that I really did know what I was doing. After a countdown, I jammed the buttons down, and WOW! The engine ignited, and with a loud sizzle, my little rocket blasted off into the sky! Another blast and the parachute popped out, and the rocket glided down to us and landed a few feet away. Our nerves turned into pride and excitement as we celebrated our success. But now the real test - repeating this with our 160 Space Club students!
The Basics: Parts of a Rocket
First, some basics of rocketry. I provided the highlights below, but I recommend checking out this presentation I created for my students for an in-depth view of model rockets.
Below is a diagram from NASA on the parts of a model rocket. These basic parts are the same for every model rocket, no matter how advanced. Read on for more details.
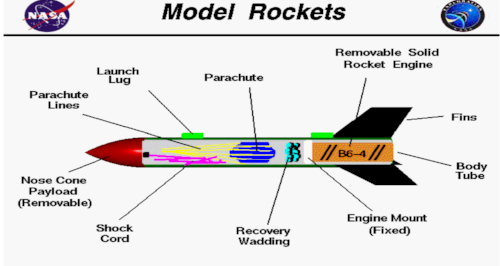
Launch lug: This is how the rocket connects to the launch rod to make sure your rocket goes straight up (instead of at your students!). Never launch without a properly attached launch lug.
Fins provide stability during flight. Fins will come in different configurations and are either made of plastic or balsa wood. Balsa wood fins are much more difficult to attach and keep aligned while drying.
Rockets are reusable assuming they are properly launched and recovered. Rocket engines are one-time use only.
The thrust of the rocket comes from the engine pushing up against the engine mount.
Lighter rockets will use a streamer instead of a parachute for the recovery system.
The parachute comes out when the engine releases an ejection charge to pressurize the body tube and pop out the parachute. Recovery wadding is needed between the engine and parachute to prevent this ejection charge from damaging the parachute.
The Basics: Flight of a Rocket
Next, you will need to become familiar with the flight of a model rocket. Another great diagram from NASA is below on the stages of flight.
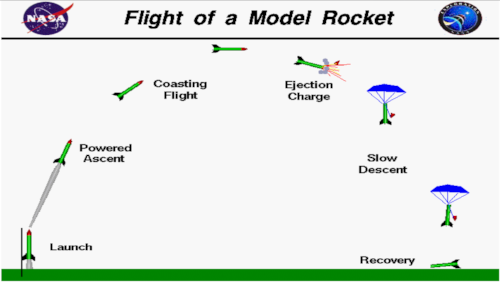
This is a good time to discuss Newton's Third Law. As the engine ignites, the action is the hot gases being pushed out the bottom of the rocket (yes, middle school students laugh every time), and the reaction is the rocket launching upward. For the rocket to move, the thrust from the engine must be greater than the weight of the rocket.
During the flight, the engine continues firing for a few more seconds, and the aerodynamic forces of lift and drag act on the rocket. Once the fuel runs out, the rocket starts to slow down from the weight and drag forces. A maximum height is reached, and students can measure this height using an Estes Altitrack and simple trigonometry.
The rocket starts to fall, and the "ejection charge" from the rocket engine pushes the parachute out. You may notice some smoke (do not panic), which is intended to help you see the rocket in the sky.
Once the rocket hits the ground, time to recover! With mild wind conditions, your rocket should lander within 100 feet away. You can replace the engine, and launch the rocket again!
Getting Started
After that first nervous launch, I have gone on to launch hundreds of rockets with kids. I tried doing the math, it is somewhere around 400 total launches! Despite doing it over and over again, I still look forward to the reaction of the kids when they push that button and watch in amazement.

To get started, I highly recommend reviewing the resources from Estes. This company produces safe and reliable rocket kits for kids as well as extensive educational materials and guides for teachers. For easy access, I created a Google Drive folder with my favorite resources here.
If you want to experience a launch right away, purchase a RTF (Ready to Fly) kit from Estes. No building is required, and you can go from kit to launch in a few minutes. However, my favorite first rocket is the Alpha III, which takes a few steps to build. I had a lot of success with these rockets in the classroom, and you can also grab a classroom set.
Before attempting to build with students, practice building on your own. Become an expert in every step in building, and then you can confidently walk students through the building as a group. While the E2X is the simplest, these rockets still take about 30 minutes to an hour of building time with students. Students love the experience, but be aware that they can get frustrated with the building. With younger students, I always walk the group step-by-step through the building process. This way, they can't skip any steps, and I can point out some common mistakes along the way. You don't want to be at the launch site and realize they forgot to attach the launch lug!
You Can Do It!
Model rockets can be intimidating, but everyone can do it! I have trained educators from various backgrounds to successfully support students in a rocket launch, and with some basic knowledge of the mechanics of the launch, everyone can do it. No rocket science degree needed! Plus, look out for future posts on a guide for teaching rockets in the classroom.
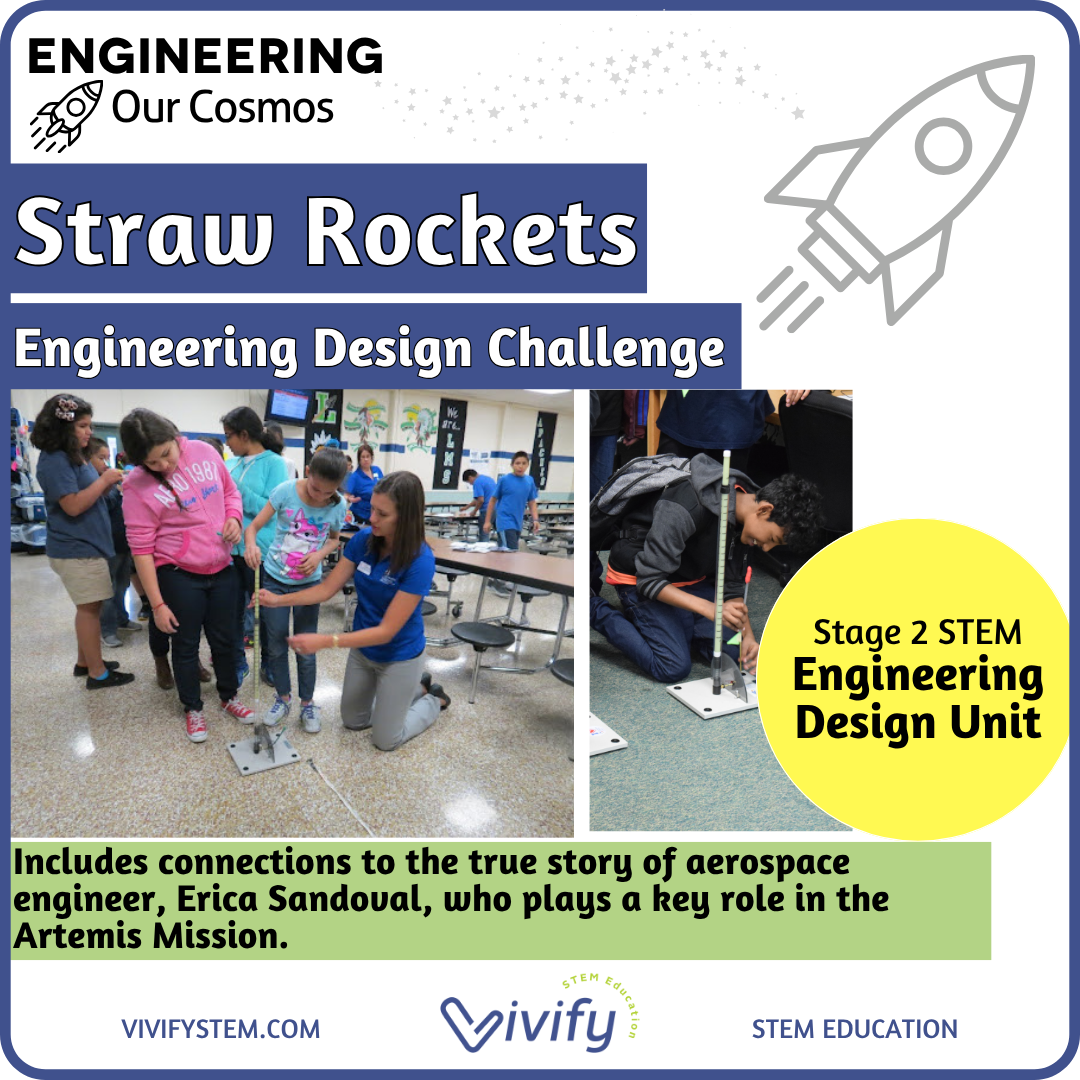
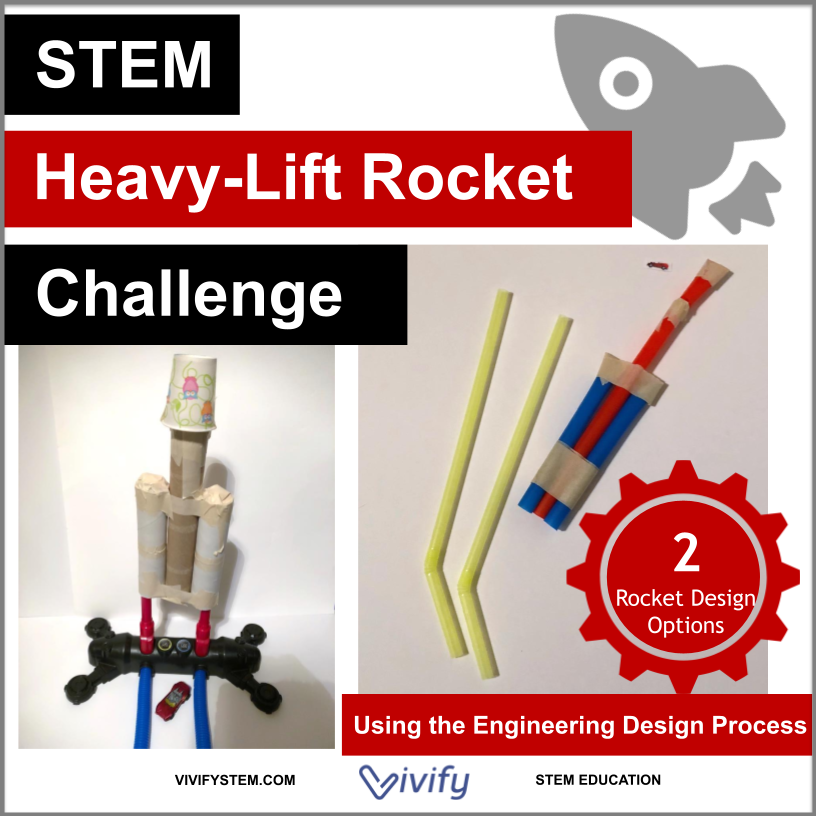
Before model rockets, I recommend introducing the concept with a simpler rocket challenge such as straw rockets. You can learn more and find more space STEM activities on our post here or check out the following rocket products.
We hope your students have a blast! ;)
Inspired by NASA’s Space Launch System and aerospace engineer, Erica Sandoval, this STEM unit invites students into the exciting world of rocketry!
Grades: 6th - 8th
Teaching Duration: 3 Days
In response to the success of SpaceX's Falcon Heavy launch on February 6, 2018, this project was created to engage and inspire students with STEM that is literally out of this world!
Grades: 4th - 12th
Teaching Duration: 3 days